
J Custom Headless Research TransTrem Retrofit to Carvin HH2
In the late 1970s, Ned Steinberger injected a lot of challenge and innovation (and continues to do so) into the world of stringed instruments. In the early 1980s, when whammy bar antics and pinch harmonic dive-bombing were prominent, Steinberger guitars came to feature a new, reimagined vibrato/tremolo bridge which brought two distinctive functions to the table: locking to a fixed position, and the ability to uniformly change the pitch of all six strings.
The uniform pitch changes throughout the device’s range meant that chords could be ‘bent’ in tune, similar to the sound of a steel guitar glissando and the position-locking meant that the guitarist could uniformly, instantly raise (by a minor third, max) or lower the whole tuning of the instrument (by a fourth, max) and pull an extended range from an otherwise standard guitar (commonly available 7 and 8-string guitars were still a few years away).
When Carvin (now Kiesel) first introduced the HH (Holdsworth Headless) series of instruments, I bought one immediately. I had been waiting for a quality headless guitar made from good materials and with the extras that I deemed essential; stainless frets, super-flat 20” radius, wider-than-usual fingerboard. At the time (2012? 2013? I can’t recall) The HH models were made with J-Custom Headless Research hardware, and J-Custom seemed to have only a fixed bridge or a Steinberger S-Trem option. I’m not a huge user of vibrato/tremolo systems (because I have never found one that stays in tune enough for my liking) but went for the S-Trem since I had never owned an instrument with that system and wanted to give it a chance. I knew I could lock it in place if I couldn’t keep it in tune, so it wasn’t a huge risk for the extra (at that time) $200.
13 or so years later, Headless USA (not sponsored; I’m just a frequent customer) announced the release of a J-Custom Headless Research rendition of the TransTrem (model II to be exact), and I immediately thought about dropping one into my HH2 since I had read (somewhere, years ago) that the TransTrem and S-Trem had identical footprints, mounting screws, etc.
I ordered a pair of the JCHR TransTrems (I also planned to try adding one to one of my JCHR graphite-necked Steinberger clones) and when they eventually arrived, I was very impressed with the build and finish quality, but even more impressed with the cleverness of the design having never before seen a TransTrem other than in photos.
Eager to get the thing mounted, I dug my HH2 out of the gear locker and set to work swapping the S-Trem for the TransTrem.
Below is the S-Trem…
The six mounting screws and locations are identical between the TransTrem and S-Trem. Some of the screws require the saddles to be removed for access.
There’s an allen screw in the side of the bridge body which squeezes the saddles against one another to hold them in place. If you want to adjust or remove the saddles, you need to loosen this screw.
Number 2 JIS (Japanese Industry Standard) screwdriver seems to fit all of these perfectly, no marring.
I got the exposed screws loose first. I was hoping to nudge the saddles out of the way when I needed to get beneath certain ones.
But the saddles just fell like a house of cards as soon as I tried to move one of them, so I cleared all of them out of there to minimize scratching, etc.
Also, in this shot you may also notice those non-standard white washers between the tail and tuning knobs. Those are PTFE washers I installed to try to combat friction and make tuning smoother. I noticed a difference for sure. I’ve done that to almost all of my Steinberger/headless tuners.
I think they’re .020” (about 0.5 mm) thick and 1/4” (6.3 mm) OD with 1/8” (3.5 mm) ID.
Out with the last of them…
The S-Trem is now free. So simple yet effective (when it stays in tune).
The TransTrem is ready to go.
Take a moment to appreciate how the more you study it, the stranger its oddly specific, asymmetrical features become. It’s a very clever device full of specialized parts. Nothing is simple about this thing
The Carvin factory S-Trem rout looks to be a perfect fit.
It’s hard to tell through this photo, but the mounting screw holes actually do line up within about .020” (0.5 mm) which is close enough to bolt it in without any trimming/shaving/etc. since there’s a margin of movement in either direction within the outline of the cavity.
I put a tiny dab of Johnson’s paste wax on each screw. I think it’s a good practice for anything with metal screws that go into wood.
I took my time, turned each screw backwards until it ‘fell’ into the threads of its hole, and then tightened them in stages to what seemed like a decent tension. It all seemed to go very easily into place, which was my hope for this hardware swap.
I dropped the saddles in…
… And ran a string over one to see how much adjustment I needed to do.
They all needed to rise by about 3/16” (4.5 mm) as a preliminary adjustment.
You can see here how high I’ve raised the first four saddles. They do have a lot of adjustment range. Good design, really.
The strings are all back on and up to approximate pitch. Time to set action, intonate, etc. I’ll admit, the TransTrem makes the guitar look really sophisticated for some reason.
I take setups seriously. Strobe tuner, feeler gauges, calipers, (spot leveling frets too if needed), etc. I’ve done this so much over the years that I can almost always get even the cheapest, crappiest guitar to play well — as long as it doesn’t have a major structural defect. The Carvin is anything but a cheap guitar, and it’s headless, so getting the action and intonation pretty much perfect was a quick, painless process.
After I got the setup perfect in the locked standard tuning position of the bridge, I attempted to adjust the transposing features. I found that the system wasn’t moving freely and suspected that there might be a clearance issue. I checked with a light and a magnifier, looking all around the rout and the trem, but couldn’t find any obvious contact that wasn’t supposed to be taking place.
I decided to un-string and pull the bridge to make sure it moved freely when not in the body.
I got all of the screws out, lifted the trem and—
“Well, there’s your problem…”
That witness mark is an awesome thing as it points to the exact place where more clearance is needed.
I still was a bit confused since I had recalled reading that the S-Trem and TransTrem used the same rout from the factory.
Then I found the below image from a 2013 article about all of the needed mods for putting an S-Trem on a synapse here
That circular recess looks like exactly what would be needed to use either bridge in that body.
I spent some more time crawling through the forgotten recesses of the internet and message boards a while longer and found a drawing that someone had posted many years ago. I think the creator of the drawing is Bernd Meissner who runs the excellent Headless Europe pages and sells great upgrades for a few Steinberger bridge models. It shows the dimensions of the main features, but absent is that excavation needed for the TransTrem’s treble side pivot.
Well, cutting a shallow cylinder into the matchstick-hard alder body should be a piece of cake. I have a 1/2” (12.7 mm) Forstner bit and the exact location of the feature is now pretty hard to miss.
Right in the middle of the mark, I carefully removed about 4mm depth of wood.
The center of that new feature is about 9 mm from the outer edge of the pocket and about 42 mm from the forward edge.
Ready to mount again.
I had taken it down to about 4mm depth.
This is all because of that lower pivot point on the bottom of the treble side.
This thing rocks back and forth in a conical section rather than a cylindrical one like most other vibrato/tremolo systems.
That pivot being so much lower than the one on the bass side means that the motion of the bar affects the position of the treble-side strings differently than the bass-side ones so as to compensate for the differing string tensions and elasticities, etc.
Oh, be sure not to drop/lose this little steel button. It belongs between the 6th string saddle and the set screw that pinches the saddle gang into not moving. It’s not retained in any way, so if the saddles are out, it’s likely to escape.
Restrung. Time for another setup.
Now that the system is moving freely (well, not quite— more on that later) I went through the iterative process of getting the thing to play in tune in all locked/transposed positions.
I found the setscrew for the locking ‘tooth’ to be a bit loose from the factory, so I made it snug before getting too deep into whether or not the transposing was stable and repeatable.
After a thorough action/intonation/etc. setup in the standard/neutral locked position…
Step 1 is to lock into “F#” which is the notch a whole tone above the standard, neutral position.
While in the F# notch, you use only the normal tuning screws on the rear of the tailpiece to tune the strings to F#, B, E, A, C#, F#
Step 2 is to lock into the “C” position which is 2 whole steps below the standard/neutral lock position. Be careful not to lock into “B”, the lowest position.
Using only the silver slot-headed adjuster behind each jaw, tune the strings to C, F, A#, D#, G, C
Cycle the trem a few times, check the pitches in the standard/neutral “E” position, and then repeat the steps above, alternating between F# position and C position and being sure to only use the rear thumbscrews for “F#” tuning and only the silver slotted screws behind the jaws for “C” tuning.
Eventually, you’re supposed to have an acceptably in-tune experience in all locked positions and the free-floating areas in between.
If you have “Calibrated” strings, that is.
I chased my tail for about 90 mins trying to get regular strings to work well with this trem. I eventually realized that it wasn’t going to happen.
I hunted for and found “calibrated” strings. My understanding through a fair amount of research is that the term “calibrated” in this context refers to the lengths of the strings.
Mr. Steinberger needed to eliminate some variables when trying to make the TransTrem repeatably work after a string change, and the calibration in this case is based on some formula that places the bridge end of the string (and the jaw anchoring it there) within a fairly tight circle of space along the surface of the imaginary conical section of space through which they travel relative to the rest.
That’s why there are two tuning screws per se— You need to position that jaw in more than one dimension on the face of the imaginary cone section.
String lengths standardized to the TransTrem system make that target area of reasonable adjustment much easier to hit, hence the calibrated string requirement.
I was only able to get super light and very light strings in calibrated sets.
La Bella is pretty serious about their products. Let’s see how the calibrated strings measure-up…
The strings seem to be fairly new as they have reinforcing wraps on the plain strings. I think that was added much later in the history of the TransTrem due to frequent string failures at the wrapped ends. Some people also recommend soldering the wraps, but that advice may have been before the extra reinforcement that La Bella added to these was common.
I used one of my saw-guide straight edges to make an ad-hoc measuring jig. It has numerous ribs and stiffening features as well as a perfect little inside wall for aligning the string in both axes.
I also wanted to be sure the strings were all at about the same tension/deflection as I measured them, and that proved to be fairly easy with this improvised jig.
I have a pile of those “Overlord of Music” headless bridge and headpiece sets, and I snagged a pair of claws from one of the bridges to hold the ball ends as I tensioned and measured.
I pulled the other end’s jaw tight enough to get any noticeable sag or catenary out of the string so as to get the most accurate length measurement without stretching the string longer than its flat, resting length. I knew once I installed and tuned these strings, the original factory-calibrated length would no longer be correct due to the 18-ish pounds of tension they’d need to be at normal pitches.
I left one jaw clamped at the end of the jig and then slid the opposite one and clamped it when the tension seemed just enough to get the string straight enough to have a meaningful length measurement.
It’s hard to see in this photo, but the string is visually parallel to the straightedge surface beneath it at this minimal tension. It seemed to make a musical note when plucked too— about an octave below its designed pitch. Let’s guess that’s about 4.5 pounds of tension maybe?
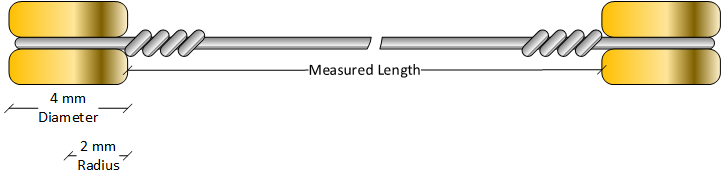
As pictured below, I’m measuring ball-face to ball-face. That’s where they’re anchored, so that’s what matters the most.
Add 8 mm for total end-to-end length or add 4 mm for center-to-center if you need those figures.
Here are the results of my measurements (taken twice for each set as a double-check) of the two sets of calibrated strings:
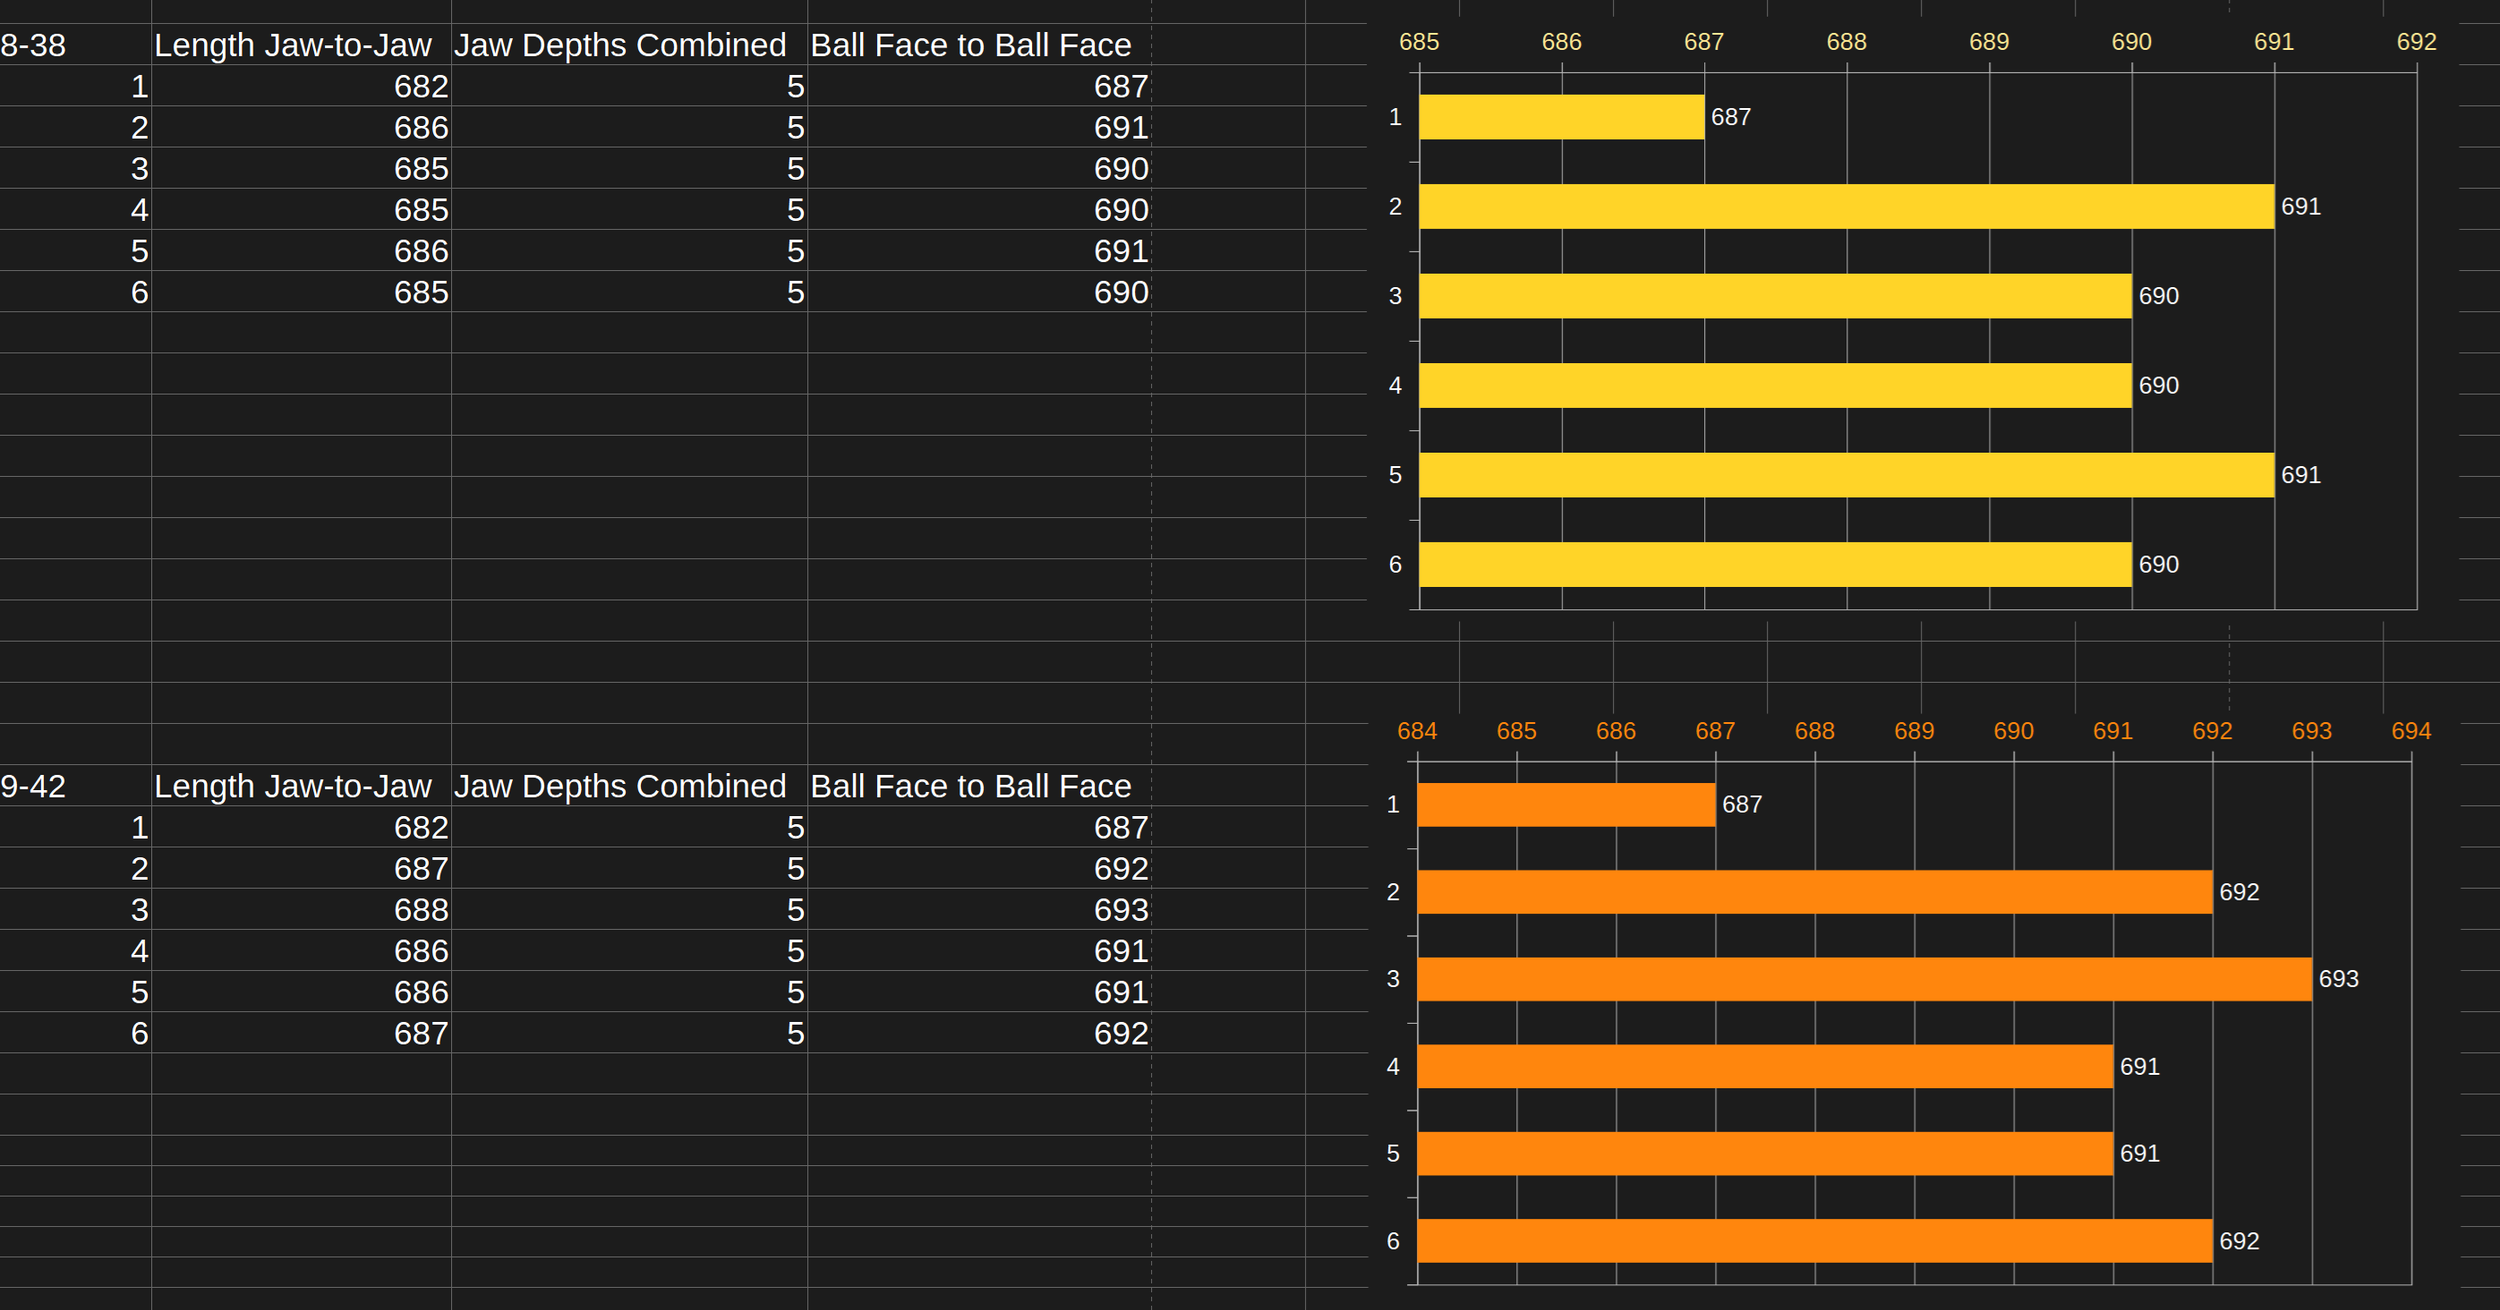
In my previously mentioned research, I had read somewhere that the tolerance for the calibrated strings was about 1/16” (.0625” or about 1.59 mm)
In this very limited sample of 2 sets it seems that most of the strings appear that they’re supposed to be equal in length except the top, thinnest string which was significantly shorter in both sets.
I got a visual confirmation of that when I (as best as one can) lined up the ends of all six strings and held the other ends together for a quick visual.
This seems to closely match the measurements that I graphed, so a (kind of) confirmation?
I figured that the jaw distance and jaw height with calibrated strings at-pitch will give me a target position to aim for when trying to use my own preferred strings, so I decided to install the more standard 9-42 set of strings and get some measurements of where the jaws were situated with everything in a normal, intonated, action-adjusted, tuned state.
Things went well until I tried getting that high E string into its jaw.
Even with the jaw fully extended, threaded beyond the lead screw’s limit, I could not get it far-enough forward to even entertain hooking the ball of that 1st string.
I had another TransTrem bridge, still in its box, waiting for another project, so I decided to swap it and see if it was an issue particular to the trem unit I was currently struggling with.
A little better with the new trem, but still not quite possible to get that 1st string hooked. I dumped the trem forward and locked it to the lowest (“B”) notch to get the jaw as far forward as possible. I then used a thin Allen wrench through the ball-end of the string to pull and slide the ball into the jaw.
It was already musically tight, even in that slacked-out B position and with the tuner only engaged on about 1 thread of the lead screw.
Either way, I got it on there.
I then had to sneak the saddle up and under, which was fairly easy, but with the additional tension it added, I can’t imagine landing that ball into that jaw with the saddle in-place.
I must be overlooking something perhaps?
With the saddle in, the string all the way ‘slack’, and the trem locked into “B”, the string rang out a solid G, just 10 semitones below it’s target pitch when locked into “E”— It was really tight for an untuned string. We’ll leave it at that and get the rest of this thing going.
Below is the new bridge, completely strung with the calibrated 9-42 set, intonated, action-adjusted, and tuned to pitch using the rear tuning screws in the “E” (neutral) position.
I proceeded with the TransTrem setup procedure (lock into F#, rear tuners, lock into C, top tuners, etc.) and I kept having the trem suddenly pop out of the “C” notch. I reseated it a few times, but it seemed to get worse, making it impossible to get the top tuners adjusted for the “C” position tuning.
I decided to try swapping the stop tab from the first TransTrem, and I put them side-by-side to see if I could find an obvious defect. It seems like the edge of the “C” notch on the one that isn’t staying in place has a bit of a bow or curve to it? I’ll have to check this under a magnifier later and maybe use a fine stone and some oil to get it less curved or sharper-edged enough to lock reliably like the other.
I’d imagine this part is hardened in some way, and maybe a heat-treating or something similar has distorted one of the parts? No clue.
What I do know is that swapping the part immediately remedied the issue. Time to move on.
With the piece from the other trem in place and working correctly, I went through three iterations of the F# and C tuning procedure and actually arrived really easily and quickly to a point where the TransTrem played pretty much (within about 3 cents, usually closer) in-tune in every single position— Yes, truly.
Up to G? no problem. Down to D? Sounds fine. What about all the way down to B? The strings are very relaxed, but it sounds decent and it is in tune.
Okay, wow. For the first time this feels to me like a legitimately musically useful piece of hardware.
Bravo, Mr. Steinberger! Bravo JCustom Headless Research and Headless USA!
When these are working correctly, they are amazing and a real treat to play!
I used a mechanical pencil to scribe the approximate center of each jaw’s position in this final, perfect setup as indicated by the easy-to-see position of the vertical tuning screw.
The vertical screws (in this final, adjusted, happy setup) look like this (note the quantity of threads exposed on each):
And if you want a good starting point for ideal jaw positions (at-pitch) when using your own, non-calibrated strings, below is my best recommendation based on the overall experience.
Keep in mind also that the factory tolerance for length on the calibrated sets is .062” (1.6 mm) so some of these measurements may reflect that accepted variance within a string set.
JCustom Headless Research and Headless USA have made available something that many players never thought would again be available. It would be neat if they took it a step further and improved the design so as to make setup easier with single-ball strings.
Like what if the silver vertical tuners were drilled with offsets in such a way that when they all sat in a straight line, the jaws would be in their (necessary) uneven positions so you could easily, visually get your string lengths very close when you clamp them into the headpiece?
There’s probably a good reason why things are the way they are though. I’m not a manufacturing engineer or someone who needs to consider production cost/speed, etc. They would know much better than me.
If you’ve been itching to upgrade your S-Trem to a TransTrem, I think it’s worth it.
If you’re going to try this yourself, remember the base clearance (circular cutout for the lower pivot) and keep in mind that non-calibrated strings will require a bit of effort on your part to get them close to the acceptable lengths needed to have the tuning transpose evenly for all strings.
I accomplished the whole trem-swap thing, but I’m left with a lot to ponder at the conclusion of this one. I may add to this article as I find out more things that I think may help everyone else who is interested in making one of these awesome little machines work on their guitar. That high E being so feckin short is really eating at me, but, damn, it works.
It works perfectly.